Building the 1/600 Airfix HMS Belfast and
Enhancing It With White
Ensign Models PE and Resin Parts
By: Keith Butterley
The
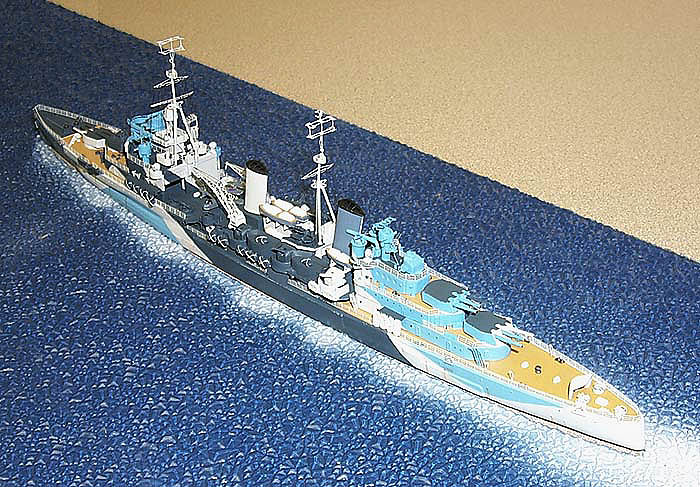
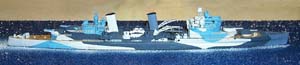
Airfix Belfast kit was first released in 1973, and today it is still a very
accurate and detailed kit, truly one of Airfix's better efforts. With the appearance
last year of White Ensign Models Photo-Etch fret for the Belfast, one can now
make a good model even better. I hope that through this article modelers will
be encouraged to take that one extra step.
In The Beginning
I decided that I would make the Belfast a waterline kit. Start by taping the
hull along and below the boot top. Using a razor saw, cut along the top of the
tape. When finished remove the tape and glue the hull halves together and then
proceed to sand. You have to install the decks before sanding in order to prevent
the hull from bowing as you are sanding. To sand the hull down, I white glued
some 60 grade paper to a 2x4 and then proceeded to run the hull back and forth
across the sandpaper. Placing the hull on a level smooth surface every now and
again to make sure I was sanding the hull evenly. You should also have your
reference photos/drawings handy to make sure you do not over do it. You can
always take it off, but you can't put it back on!
Building a Display Base
 I
build all my ships from the ground up or - more appropriately - the water up.
I start with a very simple display base that anyone can build. I use a Plexiglas
fluorescent light panel, which can be purchased through your local building
supply store. The type I use is called 'cracked ice'. I took the now-sanded
hull and traced around it with a marking pen on the flat surface of the panel.
Next, using my electric drill with the smallest bit attached, I drilled a series
of holes inside of the traced outline. These holes drilled beside each other
gave me enough room to get the blade of the razor saw in the crack. Remember
to cut inside the traced line. When finished I put the hull in the hole to check
fit. Unfortunately, my drawing skills leave something to be desired and I had
gaps on both quarters. These gaps were very small and were hardly noticeable
when the hull was placed in the hole.
I
build all my ships from the ground up or - more appropriately - the water up.
I start with a very simple display base that anyone can build. I use a Plexiglas
fluorescent light panel, which can be purchased through your local building
supply store. The type I use is called 'cracked ice'. I took the now-sanded
hull and traced around it with a marking pen on the flat surface of the panel.
Next, using my electric drill with the smallest bit attached, I drilled a series
of holes inside of the traced outline. These holes drilled beside each other
gave me enough room to get the blade of the razor saw in the crack. Remember
to cut inside the traced line. When finished I put the hull in the hole to check
fit. Unfortunately, my drawing skills leave something to be desired and I had
gaps on both quarters. These gaps were very small and were hardly noticeable
when the hull was placed in the hole.
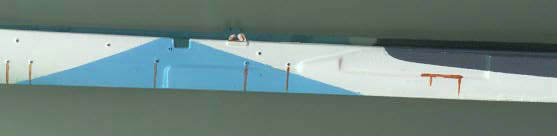
 Removing
the pen line, I was now ready to paint the wake. I taped the bow area in a 'v'.
You want a hard line here and not a soft one as the ship would be digging into
the water here and the demarcation is very sharp. I sprayed Model Master Flat
White FS37875 for the wash, making sure to give it that extra blast at the stern
and feathering back for the wake. I then over sprayed with a couple coats of
Model Master Blue Angel Blue FS15050.
Removing
the pen line, I was now ready to paint the wake. I taped the bow area in a 'v'.
You want a hard line here and not a soft one as the ship would be digging into
the water here and the demarcation is very sharp. I sprayed Model Master Flat
White FS37875 for the wash, making sure to give it that extra blast at the stern
and feathering back for the wake. I then over sprayed with a couple coats of
Model Master Blue Angel Blue FS15050.
Painting the Hull
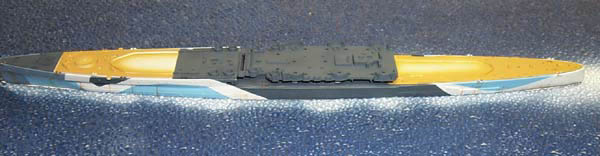
 I
primed the hull with Model Master Light Gray FS36495 and applied the AP507C
(Humbrol 147) over that. I masked the pattern for B6 (Humbrol 68) next, then
B5 (Humbrol 144) and finally the AP507A (Humbrol 112). You do tend to go through
a lot of tape, but it is easier to do one colour and pattern at a time. I use
the green painters low tack masking tape for all my taping needs. I had very
little seepage of paint under the tape and therefore only a little touch up.
I
primed the hull with Model Master Light Gray FS36495 and applied the AP507C
(Humbrol 147) over that. I masked the pattern for B6 (Humbrol 68) next, then
B5 (Humbrol 144) and finally the AP507A (Humbrol 112). You do tend to go through
a lot of tape, but it is easier to do one colour and pattern at a time. I use
the green painters low tack masking tape for all my taping needs. I had very
little seepage of paint under the tape and therefore only a little touch up.
Rusting the Hull
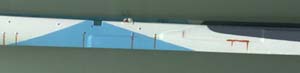 To
do the rust, I used a child's watercolour set. I mixed green, black and orange,
until I achieved what I thought was the right colour. All of the pictures I
have of the Belfast only show rust coming from the lower set of scuttles. I
ran tape down from either side of the scuttles to the waterline and painted.
Then taking a damp tissue I wiped away the excess paint, leaving a 'stain' of
rust. It is very effective.
To
do the rust, I used a child's watercolour set. I mixed green, black and orange,
until I achieved what I thought was the right colour. All of the pictures I
have of the Belfast only show rust coming from the lower set of scuttles. I
ran tape down from either side of the scuttles to the waterline and painted.
Then taking a damp tissue I wiped away the excess paint, leaving a 'stain' of
rust. It is very effective.
The Decks
 These
were fairly straightforward. The only thing I can advise you on is to plan ahead.
What's that you say? Well it's like this. I was so mesmerized by getting the
decks down and painted I failed to notice a couple of things. First off,once
they were down, I forgot about the hole on the side of the hull where the accommodation
ladder was to fit. No problem, cut off ladder and use the rest as a plug and
fill seams. I also forgot to fill the holes in the decks where other ladders
and the Carley float racks were to fit. More filling . . . aaarrrggh!!! Like
I said plan ahead.
These
were fairly straightforward. The only thing I can advise you on is to plan ahead.
What's that you say? Well it's like this. I was so mesmerized by getting the
decks down and painted I failed to notice a couple of things. First off,once
they were down, I forgot about the hole on the side of the hull where the accommodation
ladder was to fit. No problem, cut off ladder and use the rest as a plug and
fill seams. I also forgot to fill the holes in the decks where other ladders
and the Carley float racks were to fit. More filling . . . aaarrrggh!!! Like
I said plan ahead.
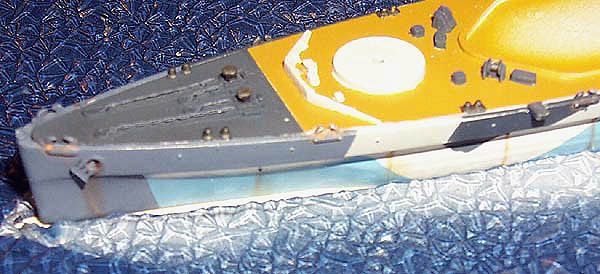
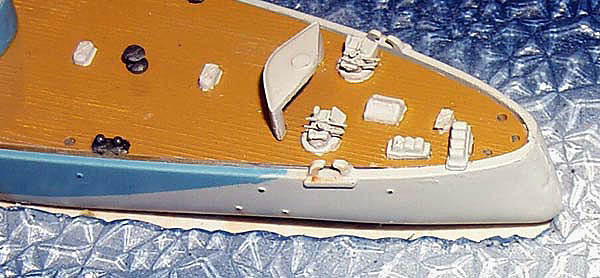
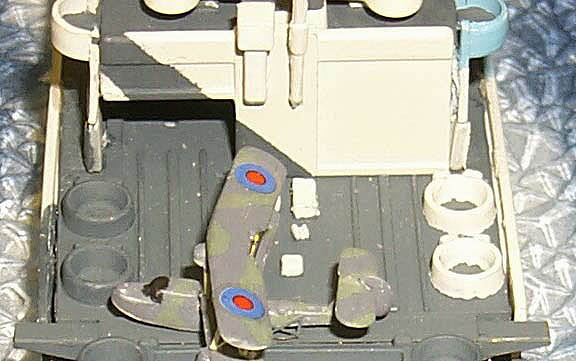
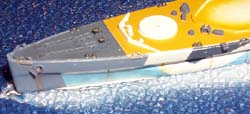
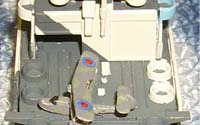 On
the positive side, the PE catapult is a nifty little model unto itself. I highly
recommend putting this on. Unfortunately most of the detail will be lost once
the decks cover it. This is another area that needs planning. Do not put the
fo'c'sle deck on until the catapult is in place. Save yourself some grief, another
learning experience courtesy of me.
On
the positive side, the PE catapult is a nifty little model unto itself. I highly
recommend putting this on. Unfortunately most of the detail will be lost once
the decks cover it. This is another area that needs planning. Do not put the
fo'c'sle deck on until the catapult is in place. Save yourself some grief, another
learning experience courtesy of me.
Attach the railing in the midship area first, and then proceed to place the
torpedo doors and gun sponson supports. Once done you can glue the gun deck
on. If you don't put the midship railing on at this time, you will probably
never get it done properly at a later date. One other thing, if you use PE ladders
rather than the kit ones, in the corners of the boat decks, is to be sure to
open the appropriate slots. They are not wide enough to accommodate the photo-etch.
Like I said plan ahead. I would have saved myself a lot of misery had I taken
my time and thought about what I was doing.
Onward and Upward
 The
6" gun turrets did not prove to be much of a problem. Please note there are
two doors on the rear of the turrets. One at each side, with a ladder on the
left side only, to the outside of the door.
The
6" gun turrets did not prove to be much of a problem. Please note there are
two doors on the rear of the turrets. One at each side, with a ladder on the
left side only, to the outside of the door.
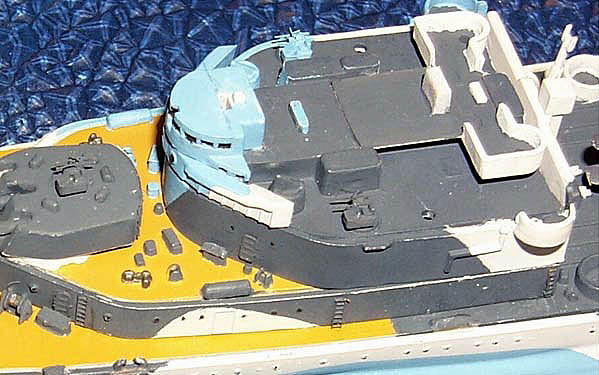
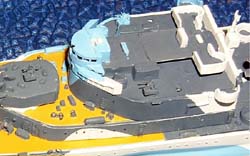
The fit of the superstructure parts is not exactly what I would call precise.
In particular the aft gun director section. I ended up with a 1/8" gap that
I had to fill. It was the only way to get the deck to fit. I used one of kit's
ladders in behind the hole. I filled it with white glue and when dry, put in
the putty. The fit of 'Y' gun deck was also bad, and the gun directors had sinkholes
that had to be filled.
Other than those problems, there is nothing very complicated about building
both forward and aft superstructures. Here is where WEM's PE comes to the fore.
I used as much of it as possible for detailing. I placed the ladders and doors
over the existing raised panel line ones. This was to give them more depth.
I added all the extra detail PE and replacement parts per the instruction sheet.
The added PE truly gave her that extra detail that makes her look great. I can
not say enough about the WEM PE. It is a must if you want to do this kit justice.
 There
is a molded ladder on the hangar roof to the lower bridge that I happily replaced
with a PE one. I then CAed a two-bar railing along the lower bridge, finished.
. . . Wrong, bilge water breath. . . . Long after the upper bridge was attached,
I realized there should have been another ladder from the walk-through down
to the hangar roof. Once again, check your references to avoid mistakes.
There
is a molded ladder on the hangar roof to the lower bridge that I happily replaced
with a PE one. I then CAed a two-bar railing along the lower bridge, finished.
. . . Wrong, bilge water breath. . . . Long after the upper bridge was attached,
I realized there should have been another ladder from the walk-through down
to the hangar roof. Once again, check your references to avoid mistakes.
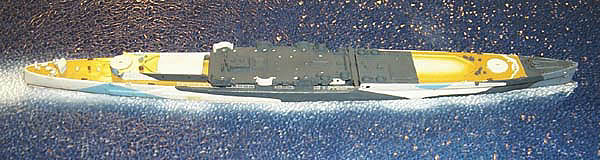
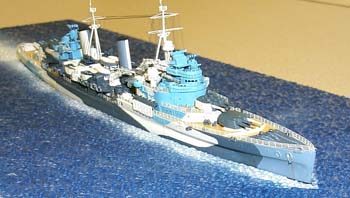
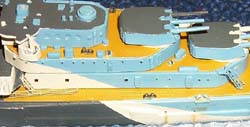
As I was putting the superstructure together, I noticed that my camo scheme
on the hull didn't look quite right. Lesson to be learned: always put the first
level of the superstructure on your ship. This way you will be able to align
it properly. If you look at the pictures of her and then look at some of the
historical photographs of the same scheme, you will see what I mean. The port
side being the biggest offender.
Away all boats!
 I
for one will be most grateful when WEM comes out with their line of resin ship's
boats. The kits ones are terrible. There are large sinkholes in the middle of
all but the smallest ones. I also replaced the molded on boat chocks with PE
ones.
I
for one will be most grateful when WEM comes out with their line of resin ship's
boats. The kits ones are terrible. There are large sinkholes in the middle of
all but the smallest ones. I also replaced the molded on boat chocks with PE
ones.
Other things on the boat deck that require your attention; make sure you file
out all the locator holes. Nothing seems to fit. I actually ended up removing
a couple of locator pins on the gun shelters.
The kit 4" HA guns and eight-barrel pompoms were replaced by WEM resin parts.
The pompoms in particular are beautifully crafted.
PE also well replaced the 20mm guns and crane booms. I used stretched sprue
to simulate the cables.
This particular section of the kit is not a major problem. It is just a matter
of detailing to the individual modeler's taste.
'MAST'erful job.
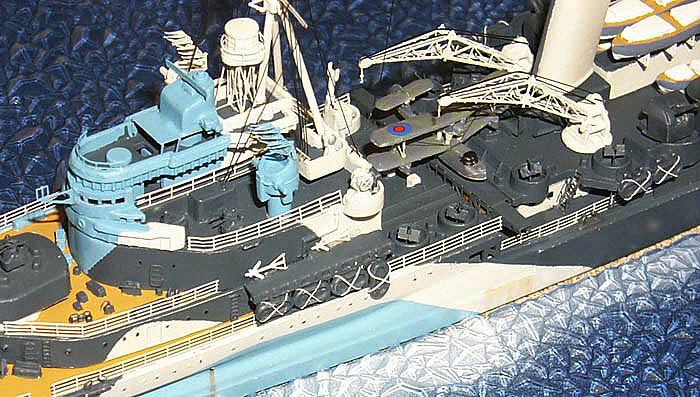
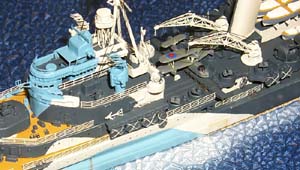
 WEM
provides many small PE parts for the mast, yardarms, starfish, radar maintenance
platform, etc. There is much detail here as there is for any other part of the
kit, the modeler can add as much as they feel comfortable with. I used the above
mentioned items and not all the little tiny bits that necessarily accompanied
them.
WEM
provides many small PE parts for the mast, yardarms, starfish, radar maintenance
platform, etc. There is much detail here as there is for any other part of the
kit, the modeler can add as much as they feel comfortable with. I used the above
mentioned items and not all the little tiny bits that necessarily accompanied
them.
The 281 radars provided me with my last major building gaffe. They are extremely
delicate and consequently do not take much abuse. Being the major klutz that
I am, I managed to knock off or bend both of them at least twice, while finishing
up the model. Therefore my advice to you is, put them on LAST.
The light at the end of the tunnel.
 From
this point on it was a matter of attaching the rigging, loading davits, jackstaff
and railings. Plus applying the tie-down straps to the Carley floats.
From
this point on it was a matter of attaching the rigging, loading davits, jackstaff
and railings. Plus applying the tie-down straps to the Carley floats.
I used 8X (.003) fly tying tippet for the rigging. I gave it a wash of flat
black paint and attached it with Superglue. One of my other failings (for a
complete list, contact my wife and be sure to have at least have 4MB of free
space on your HD), when I rig, I do it more for effect, than historical accuracy
or what would be nautically correct. I used 700  scale
ladder sections glued to the deck as attachment points, there again not exactly
accurate, but effective.
scale
ladder sections glued to the deck as attachment points, there again not exactly
accurate, but effective.
I used stretched sprue for the tie-down straps. I tried some other mediums
as suggested by fellow modelers on SMML, because I wanted something flat not
round, but I could not get them to work for me. Suggestions anybody?
I wrapped it all up by airbrushing on Testors Dullcote.
Conclusion.
Although the kit does show its age a bit, I don't think it is anything that
the experienced modeler can't handle. With the addition of WEM PE and resin
parts, you can make her a real winner.
Thanks to Caroline Carter at White Ensign
Models for the PE and resin parts to complete this article.
Copyright © SMML 2003
 The
Airfix Belfast kit was first released in 1973, and today it is still a very
accurate and detailed kit, truly one of Airfix's better efforts. With the appearance
last year of White Ensign Models Photo-Etch fret for the Belfast, one can now
make a good model even better. I hope that through this article modelers will
be encouraged to take that one extra step.
The
Airfix Belfast kit was first released in 1973, and today it is still a very
accurate and detailed kit, truly one of Airfix's better efforts. With the appearance
last year of White Ensign Models Photo-Etch fret for the Belfast, one can now
make a good model even better. I hope that through this article modelers will
be encouraged to take that one extra step.