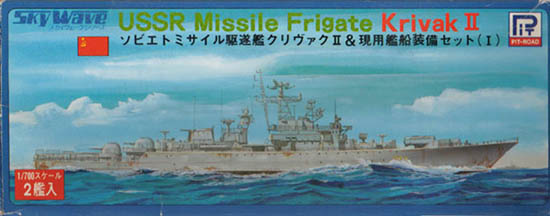
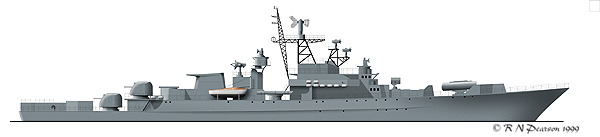
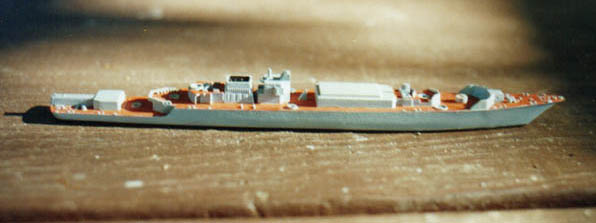
Krivak II - Soviet ASW Frigate
Skywave - 1/700
By: Shane Jenkins
The Krivak I class ASW frigate entered service with the Soviet
Navy in 1970, with the Krivak II entering service between 1976 and 1981. There
is also a Krivak III, but that falls outside the scope of this article. They
were designed as an ASW (Anti-Submarine Warfare) Frigate, but in 1978 were
redesignated as Patrol Ships.
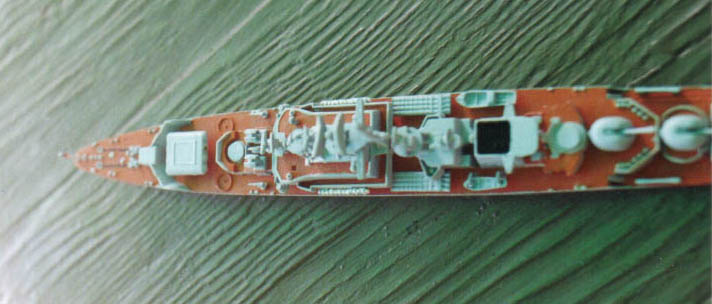
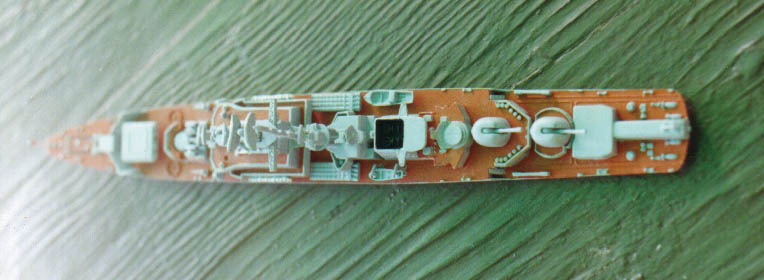
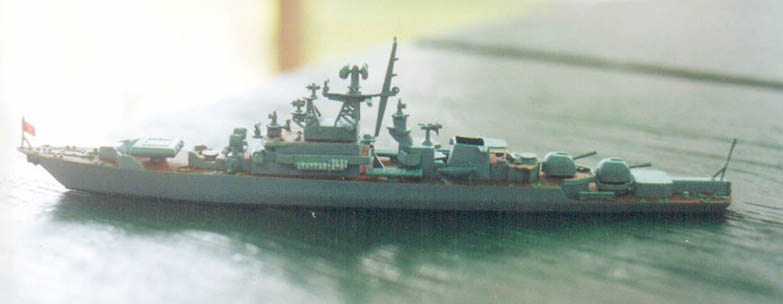
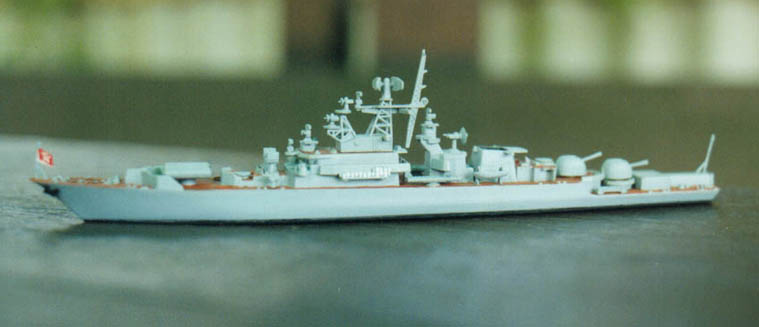
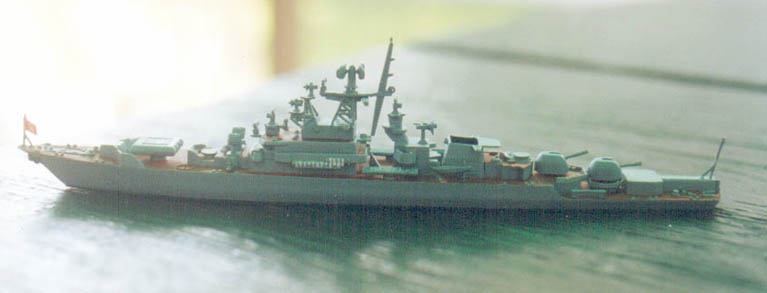
The Krivak II is armed with the following:
SS-N-14 Silex ASM launcher w/ 4 chambers
SA-N-4 "Gecko" twin launchers (x2)
100mm gun turret (x2)
533mm Quad torpedo launchers (x2)
RBU 6000 ASW rocket launchers (x2)
 |
At this point it must be stated that I normally don't
build modern ships, my interest mainly lies with WW2. So when Bob Pearson
asked me to do a Krivak for the Internet Modeller Russian edition and said
that he would supply the kit in exchange for one of mine, I felt it would
be a change. Having said that, the Krivak was a hard subject to nail down.
It appears that the Soviet navy has no hard and fast rules about colours,
ie they changed it everytime they were in port.
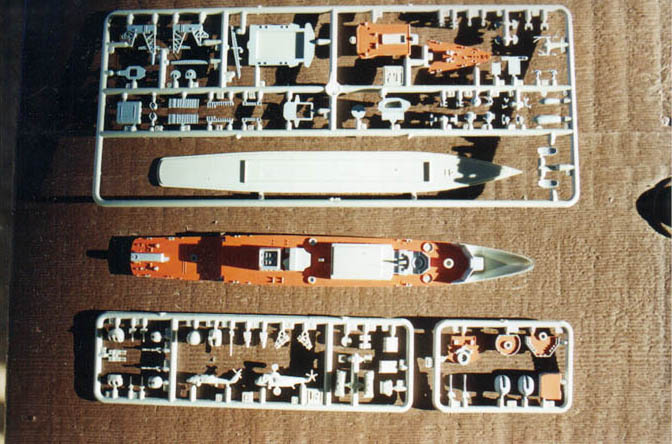
Skywave have done a reasonable job with their Krivak, it is moulded
in light grey and looks the part. You also get two kits in one box as per
Skywave's normal practise with their smaller kits, at least until recently.
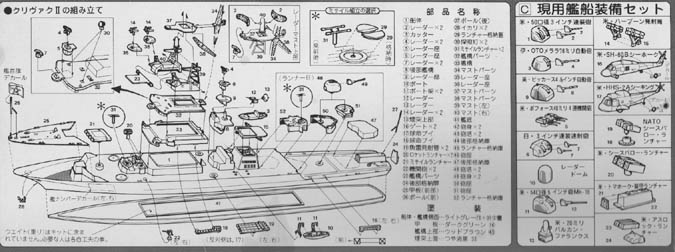
The instructions are on the back of the box, which didn't endear them to me
as you will find out further along. It also must be said from the outset that
the best way to build this kit would be to avail yourselves of the Gold Medal
Models Modern Navy set in 1/700 (available from White Ensign Models andother
outlets), but I had decided to build it OOB.
 |
 |
|
|
I started off by first painting as much as I could on
the sprue. I find this to be easier, although others may want to wait until
some construction is done. I (hand) painted the hull with Humbrol 128 (satin
US gull grey), the decks with Humbrol 100 (matt red brown), the anchors Humbrol
33 (matt black) and the life capsules Humbrol 34 (matt white). Painting on
the sprue can lead to problems later on, which might mean sanding back the
paint, but again this is a personal choice
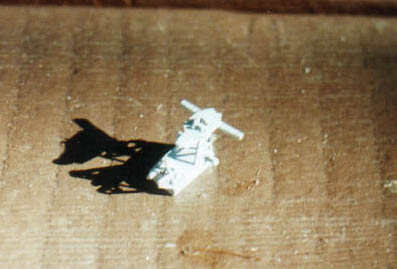
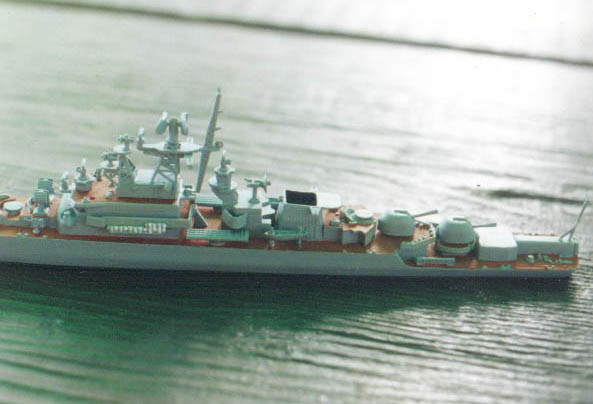
Construction was begun by attempting to put together the main antenna
mast and housing parts No 39 & 40. When I removed part 40 from the sprue I
inadvertently left the radar housing on the sprue, this proved a blessing
in disguise as it was easier to work the part without it on, but again the
choice is left up to you. I then glued both parts together and then had a
look at the sprue and instructions to see what to do next, what I saw was
that part 23 was supposed to go in with part 39 & 40. This is what I meant
by the instructions not being all they should be.
So after much cursing and swearing, I separated 39 & 40
(thankfully I found out pretty quick) and then proceeded to work out how part
23 is supposed to go in. What you have to do is put 23 at an angle between
the pylons and place it down on either 39 or 40. Then with 23 in place, angle
the other part and press firmly. I dry fitted this first and it looked great.
I then proceeded to glue it in place and all hell broke out, it took me about
three attempts to get it right. My advice here would be too either dry fit
it and glue from there (underneath there is space to do it) or just use the
GMM set as this will give you a more realistic looking antenna (plus other
goodies).
 |
 |
I then proceeded to hand paint the decks and vertical
surfaces with many a touchup job here and there :-).
 |
 |
 |
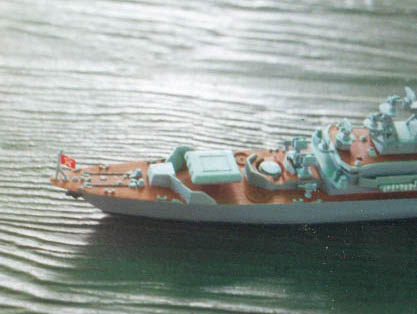
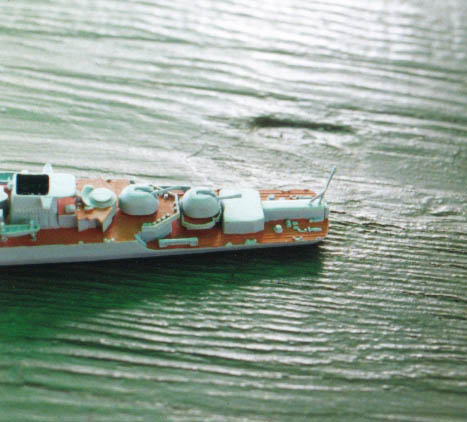
I then put part 25 in, this is the deck for the bow and
whilst fitting pretty well, it will need some filler. The same applies for
parts 52, 50 and 47 not much but some of the same. As I had painted beforehand,
some of the hassles in fine painting was gone but not all.
Part 50 which is the X mounting was a bit hard to get flush, but some
judicial filing and paint removal helped. I then started on the bridge structure
(parts Nos. 32 & 33) by painting the windows Humbrol 53 (gunmetal), as white
didn't look good and black was too dark. They were put together with a small
amount of filler. The midships structure (parts No 8) was put on, again with
a small amount of filler.
This is where I started to strike some hassles. As stated above I started
on the bridge structure and when the time came to fill in the gaps, I thought
I'd experiment with Zap a Gap for the join lines - BAD mistake. After some
judicious sanding the join line was still there. I then proceeded to fill
it with putty and sand back, the join line was still there. This took a few
attempts to get right (or at least to my satisfaction). After yet more touch
up work, I finally attached the bridge structure to the hull.
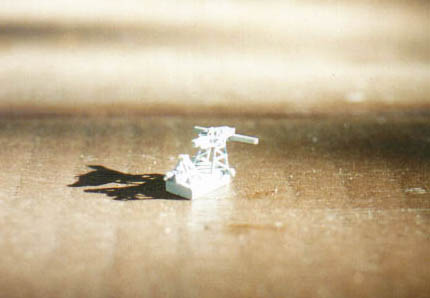
My next job was to put in the SA-N-14 hatch covers (parts 29 [x4]).
The instructions give you a choice of covered or with the launcher in place.
As I couldn't find any picture with the launcher coming out of the silos ,
I decided to just put the covers on. These come in two parts for each silo
and they were a pain to get right. My advice here would be to either persevere
with the kit parts or scratchbuild a cover out of plastic card - this would
most proberly be easier. The dreaded carpet monster nearly devoured these
parts as they flew out of my tweezers whilst trying to fit the buggers.
 |
 |
 |
I then proceded to work on the antenna (yet another)
structure on part 8 (midships platform). Parts 9 & 6 had a bit of work to
get them relatively flush, with repeated sandings and putty applications,
this was mainly due to the small amount of filler actually needed (and not
what I applied) and awkwardness of the job. The next job was putting the funnel
cover (part No 15) on and sanding back. Be very careful when sanding back
as this part is a bit fragile and broke while sanding. No hassle to fix it,
but just be careful. I fixed part 51 (aft turret platform) and this went on
with no problems. Gee, I must be getting better. Also part 24 (VDS protective
door) was put in. I didn't fill in the gaps as it has the appearence of being
a door (overscale, yes).
I then filled in some minor blemishes in the hull and repainted it.
After adding in all the sundry radars, guns, anchors, liferaft canisters.
I finished off by touching up my paintjob. I then attempted to fit the flag
decals to their respective masts and they went on reasonably well (I've never
had much success with flag decals). In respect to the hull numbers, well I'm
still in two minds about adding them as I can't confirm if any apply, because
as I stated above they changed on each deployment.
 |
 |
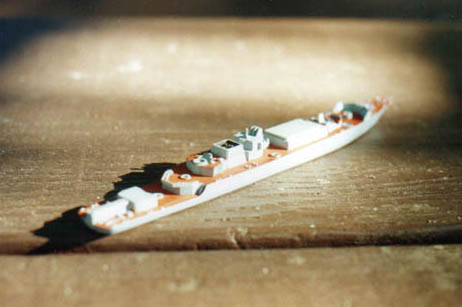
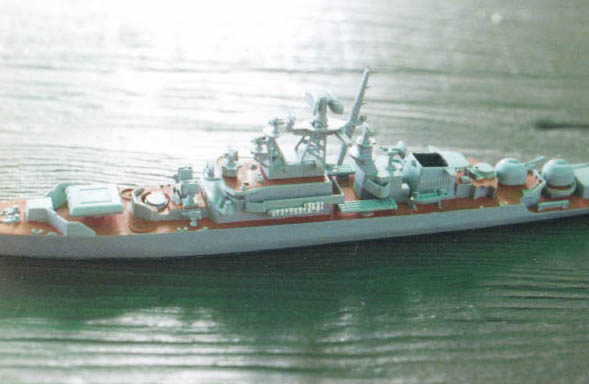
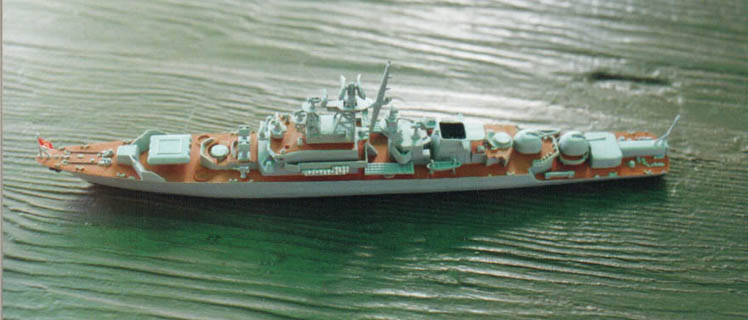
Now the Krivak was ready to go and all I needed was to
take some photos, but before that happened, I took it to a local club attached
to an old dinner tray with blutack for the 100Km trip (yes that's local) via
the airport to see someone off. Now it was a hot day and by the time I got
it to the club and was ready to take it off the tray, the damm thing didn't
come cleanly off and the hull plate stayed on while the hull came off and
I lost one of the searchlights, wrecked one flag decal and had to reglue parts
back on. So the end result you see in the photos is not quite what it was,
but it's close.
 |
 |
 |
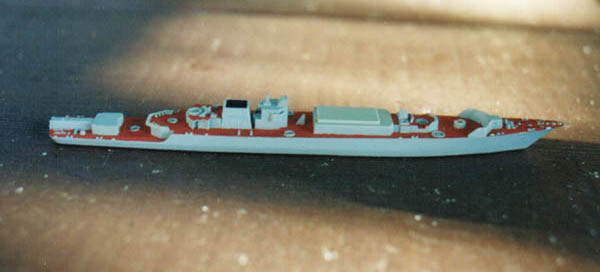
Now as to how accurate it is, well the waterline length
of the model is approx 163mm and the deck length is approx 175mm, which makes
it fairly accurate by my limited references, which give the length as 123.5m.
This makes the model approx 5mm short, which is close enough for me. The kit
looks like a Krivak II and that's really all that matters to me.
 |
 |
 |
I would recommend this kit to any modeller who has a
couple of kits under their belt. It goes together reasonably well and apart
from the main radar assembly, it's pretty easy. Sure it needs some filler
here and there, but that could just be me. As I said above, the GMM 1/700
USSR Modern Navy set really is a must for this kit and is available from White
Ensign Models amongst others. I'm not sure of the current availaibility of
this kit, however, in the recent past, Skywave has sold/leased some of it's
moulds to Tamiya, Revell and Dragon. As of yet the Krivak kits (Krivak I and
II) have yet to make a re-appearance, let's hope this situation changes in
the near future as this kit deserves a wider release.
I'd like to thank Bob Pearson for the artwork, Falk Pletscher for his
colour suggestions and Caroline & Dave Carter for their help with this info
about the Krivak and P/E. Also thanks go the crowd at RMS and SMML for their
help with information.
Additional links:
Internet Modeler
Gold Medal Models
White
Ensign Models