Royal Navy O Class Destroyer
Tamiya - 1/700
By: Mike Dunn
Well, I've heard this kit talked about a lot, and seen it quite a bit as well,
so I thought I'd kill two birds with one stone and get it. The two birds? Well,
my wife keeps complaining I don't build enough kits so I've challenged her to
do some - starting with this one, and I need the practice with PE frets as well.
 So
- what do you get? It's a small box, with the ubiquitous warning sheet, instructions
sheet, decal and two sprues, each holding a complete set of parts for a
destroyer. Yes, that's right - two ships. In addition, there is "spruelet" -
this just holds the base of the kit, and seems to have been attached at one
point to a larger sprue, probably only at the factory.
So
- what do you get? It's a small box, with the ubiquitous warning sheet, instructions
sheet, decal and two sprues, each holding a complete set of parts for a
destroyer. Yes, that's right - two ships. In addition, there is "spruelet" -
this just holds the base of the kit, and seems to have been attached at one
point to a larger sprue, probably only at the factory.
The quality of the sprue is quite high. There is a little excess flashing,
for on some parts the mould is slightly out of tolerance, but this is a very
minor niggle. Detailing is crisp, albeit slightly out of scale for some aspects.
The hull is one entire piece, with the superstructure consisting of four main
boxes, and ancillary parts - guns, funnels, davits, etc.
The decals, such as they are, are clean and without blurring. With the exception
of two White Ensigns, they are three sets of all the eight pennant numbers of
the class in black, and three sets in white. Also here, are eight Plimsoll lines.
I guess that they are expecting you to be a little sloppy with the numbers -
only two are used per vessel. The lines, however, are lacking in quantity, as
you are supposed to use no less than six per vessel - four short.
The instructions are on both sides of one sheet. The front has a copy of the
box art, with the class's history in both Japanese and English. A nice touch
- all eight vessels are listed by name (but not pennant), and armament changes
are noted. I assume that the lowest four pennants are for the first four vessels,
with the others for the latter four, as this is how the armament change breaks
down. For the record, the change is the replacement of the 4.7" guns with 4"
guns, and a refit at a later date to mine layers. Turning the sheet over reveals
the instructions. These are broken down into six main parts - sub-assembly of
the Signal deck, of the Bridge deck, of the Funnel, of the Pom pom platform,
and of the Emergency conning tower, followed by the assembly of the hull with
half of the detailing parts and the Funnel with the Emergency tower. The last
step is the Signal and Bridge decks together with the Pom pom platform, aft
gun deck and the remainder of the detailing. Procedures 1 through 5 are clearly
laid out, with no room for confusion. Procedure 6 is a different matter! As
mentioned, this is split into two main parts, and you need to be careful on
each. The first area of confusion comes in when you have to decide which gun
type to choose - which is the 4", and which the 4.7"? Next, the Bridge-level
davits, the Funnel and the radio mast are confusingly laid out closely together
- pay great attention to this part. The second part gets most of it's confusion
from the location of the decals, and the attachment of the starboard cutter,
given it's own mini-section. As this is just the reverse of the attachment of
the port motor launch, I feel that this is a meaningless, and confusing, addition,
as I spent several minutes trying to figure out if there is a difference - and
there isn't! The small boats are obviously different , but attach in the same
manner.With the decals, the confusion comes in with the instruction to attach
both the white and black pennants on both sides; ditto with the attachment of
both White Ensigns at the stern! A little thought will clear this up, unlike
the Plimsoll decals - three per side, and only eight in total for two vessels
 For
the painting guide, you are referred to the back of the box. This gives a starboard profile,
and a top profile, both of which are annotated with the relevant Tamiya colours
to use, eg XF-1. This can be used as an additional decal guide for both the
pennants and the Plimsolls, as the profiles seem to be 1:1 to the models. No
camouflage guide is given; for this, refer to the box art. One item to note
here : it is at this point, and this point only, that you are shown the difference
between the two guns provided. I would have liked to have seen this referenced
in the instructions, but at least it exists. It just goes to show - you have
to read ALL the instructions BEFORE you do a thing!
For
the painting guide, you are referred to the back of the box. This gives a starboard profile,
and a top profile, both of which are annotated with the relevant Tamiya colours
to use, eg XF-1. This can be used as an additional decal guide for both the
pennants and the Plimsolls, as the profiles seem to be 1:1 to the models. No
camouflage guide is given; for this, refer to the box art. One item to note
here : it is at this point, and this point only, that you are shown the difference
between the two guns provided. I would have liked to have seen this referenced
in the instructions, but at least it exists. It just goes to show - you have
to read ALL the instructions BEFORE you do a thing!
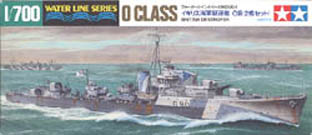
As mentioned above, the box art has one of the O Class in camouflage, in the
North Atlantic (I assume, from the sea colour). Exactly which scheme she is
using, I have no idea! perhaps one of our experts could tell us - always assuming
that it isn't artistic license! I suspect that it probably is, as various parts
of the artwork are at odds with the kit layout, eg the emergency conning tower.