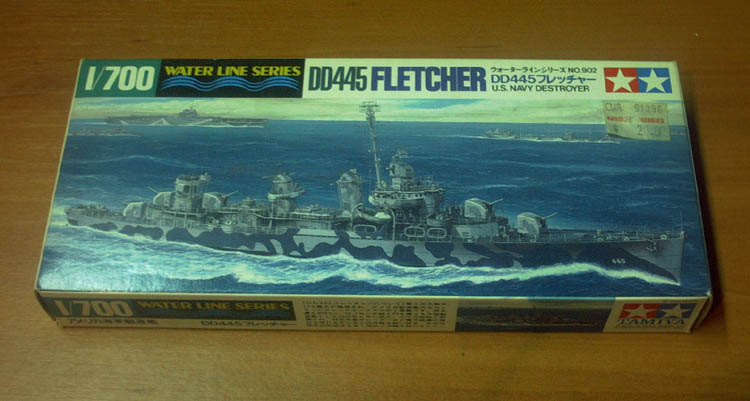
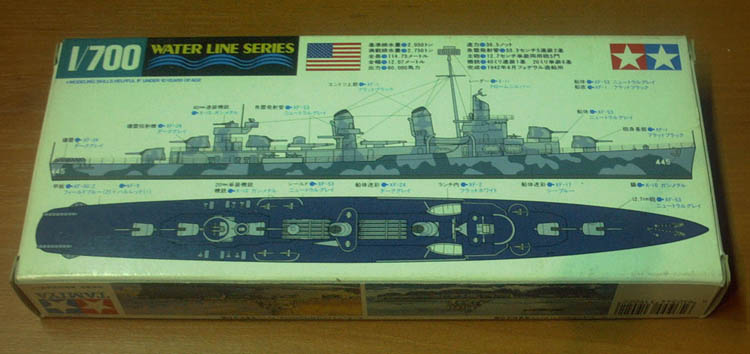
 Tamiya's
1/700 Fletcher represents the early rounded bridge destroyer as built in June
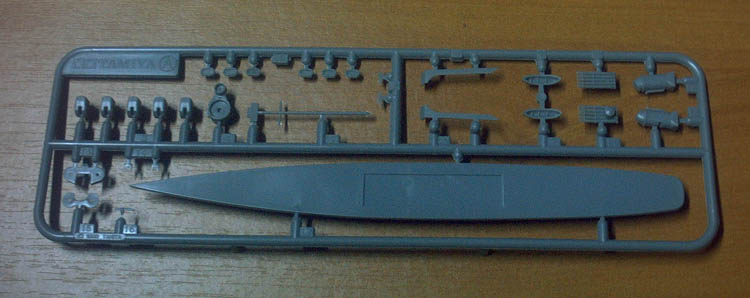
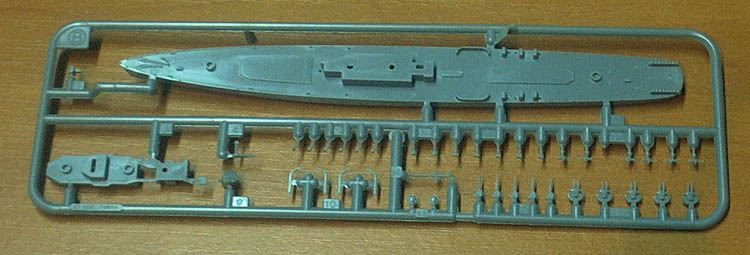
1942 with the minimal AA fit . The hull comes in one piece with most of the
midships deck houses attached and a separate waterline keel plate. The funnels
come as one piece and the shape is correct while the pilot house roof and the
bridge wings have the correct step moulded onto them (something ignored in previous
Fletcher kits).
Tamiya's
1/700 Fletcher represents the early rounded bridge destroyer as built in June
1942 with the minimal AA fit . The hull comes in one piece with most of the
midships deck houses attached and a separate waterline keel plate. The funnels
come as one piece and the shape is correct while the pilot house roof and the
bridge wings have the correct step moulded onto them (something ignored in previous
Fletcher kits). While nicely molded there is minimal surface detail and the weapons are better replaced. Tamiya give you clear instructions and the kit itself is an easy build although you will need to clean up the mold lines. Decals are provided and as the kit captures the look and proportions of the Fletcher, built out of the box, you will be rewarded with a kit that looks like a Fletcher. However, a bit of extra work in adding more detail and this kit will really shine.
 Improving
the kit
Improving
the kit These are the things which have occurred to me while looking over the kit. They'll all improve the model but it is not necessary to do all of them. Careful checking of your references will help you through these steps.
Superstructure
The forward deckhouse does not have enough rise to it. Add a .010" shim at the front and
 putty
the resulting gap.
putty
the resulting gap.Add doors and ladders to the ships bridge as well as the forward deckhouse.
As mentioned earlier, the funnels are good but you can remove the pipe attached aft of the funnel and replace with 12." brass rod. Hollow the funnels out and add funnel grilles.
There are some mushroom vents near the forward torpedo tubes. Located abreast the tips of the tubes and on the port side, they can be added to help break up the deck.
 External
piping and conduit can be added using stretched sprue, brass rod or wire depending
on preference.
External
piping and conduit can be added using stretched sprue, brass rod or wire depending
on preference. Searchlight platform supports can be added and you may even wish to replace the searchlights with aftermarket parts.
The Mk.22 radar needs replacing and the foremast requires the small SG surface search radar.
Floater net racks and baskets can be added.
The mast needs help to make it stand out - add a ladder and some fighting lights. There is also a ladder to the bridge next to the mast but be warned, it will be challenging to add it into such a small space.
Tamiya suggest you make a pole mast and place it into the 40mm gun tower. Don't bother. There is a whip antennae there which is barely visible and certainly won't be in this scale.
An aerial spreader was attached to the aft stack - you can build these out of various sized rod.
Finish up with radio antennaes and rigging and if you like, add some figures.
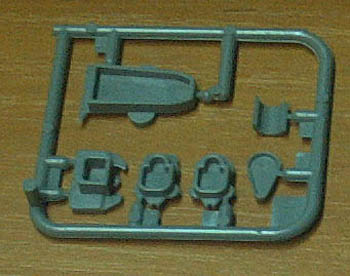
Weapons
The gun director tower seems a bit tall, some sanding may help. Be VERY careful handling this part if you are using the kit parts as the range finder arms are fragile. The weapons in this kit really repay replacing with aftermarket versions. Just about all the major manufacturers make sets of 20 mm and 40mm guns - some with resin mounts. All of them are good but can be improved with some sights added above the barrels and some railings attached behind the mount. Add some ammunition boxes behind the 20mm gun tubs.
Torpedo tubes can be bought or you can improve the ones in the kit by adding brass rod to the outboard tubes.
Remove the depth charge racks which are moulded on the deck, make some new ones and add depth charges made out of rod to them.
 The
5" mounts are too small. Currently your best hope is to replace them from a
Skywave weapons set. Failing that you'll either have to live with them or make
a master and plunge mold a few mounts. Any of these options will be improved
by the addition of some photoetched doors and ladders and by using brass rod
for the gun barrels instead of those supplied in the kit. Blast bags can be
made using foil.
The
5" mounts are too small. Currently your best hope is to replace them from a
Skywave weapons set. Failing that you'll either have to live with them or make
a master and plunge mold a few mounts. Any of these options will be improved
by the addition of some photoetched doors and ladders and by using brass rod
for the gun barrels instead of those supplied in the kit. Blast bags can be
made using foil. Painting
USS Fletcher should be painted in a Measure 12 Modified scheme using 5-S Sea Blue,
 5-O
Ocean Grey, and 5-H Haze Grey with the colour Deck Blue 20-B on the decks and
horizontal surfaces. As there was immense variation in application of this scheme,
I'm not surprised that the box art and the painting guide that come with the
kit don't agree, however it is a good guide. Recent research (David William's
Naval Camouflage 1914 - 1945) suggests that while many ships painted in this
scheme were painted differently on the port side to that of the starboard, some
were not. However, my references suggest that the USS Fletcher was one of the
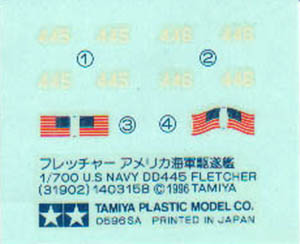
ones which had a variance in pattern on either side. The decal sheet includes
flags and numbers for a couple of Destroyers and there are walkway decals available
from Dunagain Decals for this kit.
5-O
Ocean Grey, and 5-H Haze Grey with the colour Deck Blue 20-B on the decks and
horizontal surfaces. As there was immense variation in application of this scheme,
I'm not surprised that the box art and the painting guide that come with the
kit don't agree, however it is a good guide. Recent research (David William's
Naval Camouflage 1914 - 1945) suggests that while many ships painted in this
scheme were painted differently on the port side to that of the starboard, some
were not. However, my references suggest that the USS Fletcher was one of the
ones which had a variance in pattern on either side. The decal sheet includes
flags and numbers for a couple of Destroyers and there are walkway decals available
from Dunagain Decals for this kit. Conclusion
This is a almost a miracle kit. It can be everything to everybody. For the beginner, it's easy to build straight out of the box, with clear instructions, few problems plus it is readily available and well priced. A good first or even second kit.
Almost all the aftermarket manufacturers have produced something for this kit, be it a set of photoetch or replacement guns. For modellers who want to add a bit more detail, the opportunity exists to add as much or as little as they like and have their efforts pay off. This kit looks great with even the most minimal amount of detail added, the extra time taken to do so is surely worth it.