IJN CVE Unyo
Aoshima 1/700
By : Bob Pearson
After
many years of building aircraft, I have recently returned to building ships. For
my first ship in over 15 years I decided to build the 1/700 Tamiya O Class destroyer,
however the more I researched the more I saw it needed correction. Therefore while
waiting for material to arrive via SMML, I started on the Matchbox HMS Kelly and
HMS Ariadne . . . same thing. 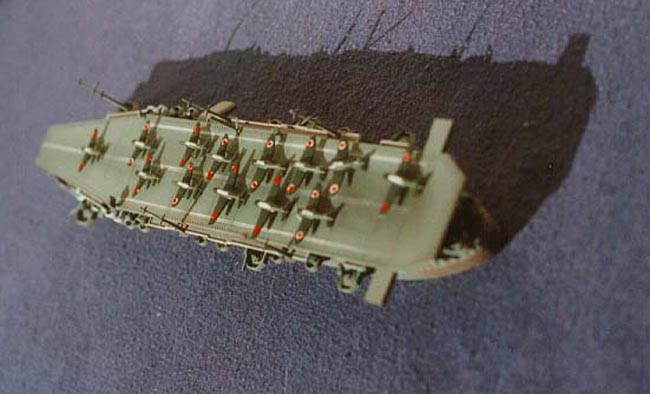 By
1940 it was becoming obvious to the world's navies that they needed more aircraft
carriers, one relatively easy solution was to modify merchant ships and passenger
liners by adding a hangar and flight deck to the existing hull. The first such
conversion was the British HMS Audacity, which was followed closely by the Japanese
Taiyo (ex-Kasuga Maru) and her sisters Unyo (ex-Yawata Maru) and Chuyo (ex-Nitta
Maru). Taiyo entered service on 15 September 1941, Unyo on 31 May 1942 and Chuyo
on 25 November 1942. The three were employed as training carriers and aircraft
transports. All were to fall foul of American submarines with Chuyo being the
first to go. She was lost on 4 December 1943 to the USS Sailfish, followed by
Taiyo on 18 August 1944, sunk by USS Rasher, and finally Unyo on 16 September
1944 victim of the USS Barb.
By
1940 it was becoming obvious to the world's navies that they needed more aircraft
carriers, one relatively easy solution was to modify merchant ships and passenger
liners by adding a hangar and flight deck to the existing hull. The first such
conversion was the British HMS Audacity, which was followed closely by the Japanese
Taiyo (ex-Kasuga Maru) and her sisters Unyo (ex-Yawata Maru) and Chuyo (ex-Nitta
Maru). Taiyo entered service on 15 September 1941, Unyo on 31 May 1942 and Chuyo
on 25 November 1942. The three were employed as training carriers and aircraft
transports. All were to fall foul of American submarines with Chuyo being the
first to go. She was lost on 4 December 1943 to the USS Sailfish, followed by
Taiyo on 18 August 1944, sunk by USS Rasher, and finally Unyo on 16 September
1944 victim of the USS Barb. 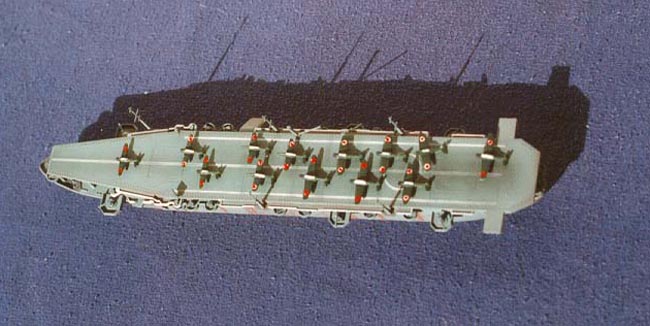 As
mentioned Unyo won out by default for my first ship in many years (2 1/2 since
my last completed model - illustration has been eating up modelling time), and
as such I decided to do it strictly OOB. For all the others in the 'rotating shipyard'
no matter how hard I tried I couldn't just build them as is, but this time I was
determined to do so as I wanted to actually finish something. In common with all
the other 1/700 ships I am working on, the first thing I did was CA the weight
onto the separate bottom of the hull and affix said bottom to the hull - that
was my first mistake.
As
mentioned Unyo won out by default for my first ship in many years (2 1/2 since
my last completed model - illustration has been eating up modelling time), and
as such I decided to do it strictly OOB. For all the others in the 'rotating shipyard'
no matter how hard I tried I couldn't just build them as is, but this time I was
determined to do so as I wanted to actually finish something. In common with all
the other 1/700 ships I am working on, the first thing I did was CA the weight
onto the separate bottom of the hull and affix said bottom to the hull - that
was my first mistake. 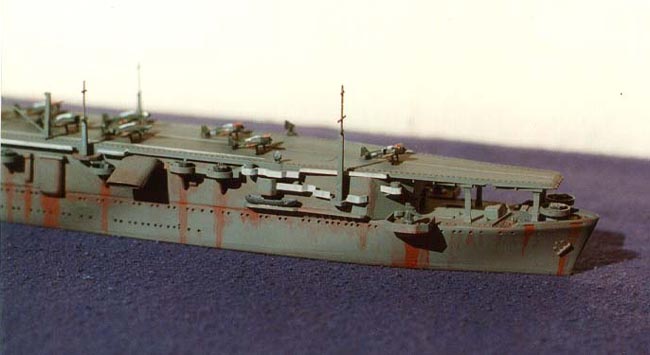 After
getting the seam between Unyo's bottom and hull nicely smoothed over I then proceeded
to add the bow and stern deck inserts. However these would have been a lot easier
to install if I had kept the bottom off the hull and been able to place a finger
inside to keep the deck at the proper location on the hull. As it is they tended
to slip down just a little - some minor carving and filing fixed this, but it
would have been easier to have just tacked them in place with CA and then used
Testors liquid cement and capillary action to do it right.
After
getting the seam between Unyo's bottom and hull nicely smoothed over I then proceeded
to add the bow and stern deck inserts. However these would have been a lot easier
to install if I had kept the bottom off the hull and been able to place a finger
inside to keep the deck at the proper location on the hull. As it is they tended
to slip down just a little - some minor carving and filing fixed this, but it
would have been easier to have just tacked them in place with CA and then used
Testors liquid cement and capillary action to do it right.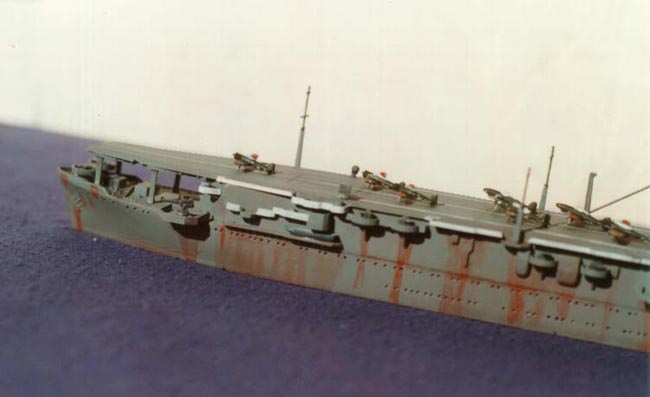 After
this was completed I was very tempted to attach the flight deck, but I had decided
that the airbrush would be used and the flight deck would be held off as long
as possible. The various gun mounts, catwalks and guns were then cleaned up and
set aside while I hollowed out the end of the funnel (my only concession to AMS
- the others ships were getting it in a full dose anyway). All the portholes were
drilled out starting with a pinvise and graduating to a motor tool (which worked
much better and seemed to give better control). Once done and cleaned up all the
platforms were then added and I returned to work at the shipyard while this one
cured.
After
this was completed I was very tempted to attach the flight deck, but I had decided
that the airbrush would be used and the flight deck would be held off as long
as possible. The various gun mounts, catwalks and guns were then cleaned up and
set aside while I hollowed out the end of the funnel (my only concession to AMS
- the others ships were getting it in a full dose anyway). All the portholes were
drilled out starting with a pinvise and graduating to a motor tool (which worked
much better and seemed to give better control). Once done and cleaned up all the
platforms were then added and I returned to work at the shipyard while this one
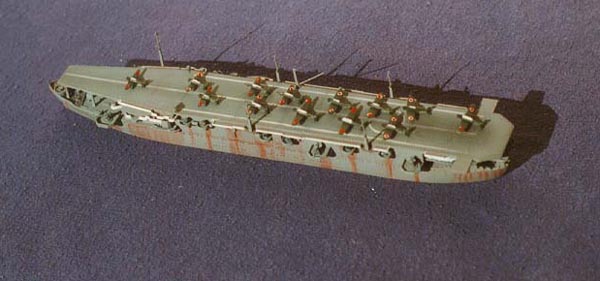
cured.  The
deck markings were then sprayed on using Ceramcoat white, while the circle was
handpainted. All the guns were now added and I turned to the airgroup. Years ago
I robbed all my 1/700 kits of their aircraft for wargaming and had to track down
where I had put them. Luckily I found a sprue of untouched IJN types, so these
were painted in Tamiya IJN green upper surfaces and medium grey bottoms (practice
remember), while black cowls, white canopies and red/white hinomarus completed
the picture.
The
deck markings were then sprayed on using Ceramcoat white, while the circle was
handpainted. All the guns were now added and I turned to the airgroup. Years ago
I robbed all my 1/700 kits of their aircraft for wargaming and had to track down
where I had put them. Luckily I found a sprue of untouched IJN types, so these
were painted in Tamiya IJN green upper surfaces and medium grey bottoms (practice
remember), while black cowls, white canopies and red/white hinomarus completed
the picture. Copyright © SMML 2002