20mm Oerlikon AA gun Set
Great Little Ships - 1/72
By: Les
Brown
Manufactured by David J Parkins, Wales, UK.
This set is one of a series produced specifically to improve the Revell (ex-Matchbox)
Flower Class Corvette kit, but there are also other applications for some of
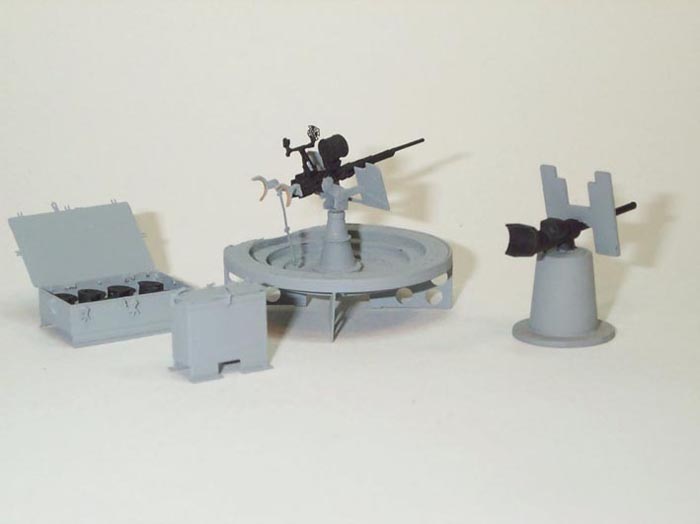
the sets. This particular set comprises parts to assemble two 20mm gun mountings,
three small ready-use (RU) ammunition lockers and one large RU ammunition locker,
the lid of which can be left open if desired.
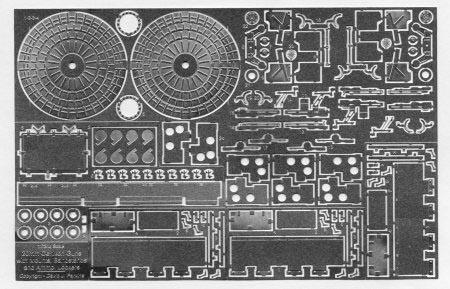
The set arrived in an A4 sized plastic bag containing a piece of card with
the etched brass sheet and the white metal parts (in a smaller bag) attached
to it, and two sheets of instructions. The first sheet contains written instructions
and the second sheet a diagram of the assembly, colour coded for the etched
and cast parts.
The white metal parts consist of two of each of the 'ring steps', the pedestal
and the barrel, together with ten magazines. The ends of the barrels are very
fine indeed and both were bent in my example, one of which broke off when I
tried to straighten it. The remainder of the parts are all clearly laid out,
and numbered, on the etched brass sheet. The brass is reasonably thick and the
connections of the parts to the 'sprue' are quite thick in places making removal
a little difficult, particularly where they occur on curved edges. It is important
to ensure that each of the brass parts is thoroughly cleaned up where they were
connected to the 'sprue' before assembly.
The 20mm Gun Mounting
 Construction
starts with the 'ring steps', which require four brass overlays to be fixed
to the casting, one on each level. The brass includes two marks so that a section
of the outer ring can be cut off for some installations, such as close to the
edge of a bridge wing. After fixing the brass, the white metal steps are then
cut to match. Although the brass is marked, I found no similar marks on the
white metal part and was a little concerned as to the orientation as the base
has four holes drilled in its underside. I could find no reference to these
holes in the instructions so proceeded, hoping this would not produce problems
later. I never did find a use for these holes!
Construction
starts with the 'ring steps', which require four brass overlays to be fixed
to the casting, one on each level. The brass includes two marks so that a section
of the outer ring can be cut off for some installations, such as close to the
edge of a bridge wing. After fixing the brass, the white metal steps are then
cut to match. Although the brass is marked, I found no similar marks on the
white metal part and was a little concerned as to the orientation as the base
has four holes drilled in its underside. I could find no reference to these
holes in the instructions so proceeded, hoping this would not produce problems
later. I never did find a use for these holes!
The pedestal has an etched brass ring round its base, representing the fixings,
and this assembly is then fitted to the 'ring steps'. The spigot of the pedestal
does stick beyond the bottom of the 'ring steps', so I cut it off level with
the rest of the base. The 'yoke' that sits on top of the pedestal comes next,
followed by the shield which is made by laminating together a front and two
'half' rears. For some reason, the part numbers for the duplicate parts were
not etched on the sheet but these are easy to identify. It is a good idea to
use the duplicate, unnumbered parts first so there is no confusion when assembling
the second mounting. I bent the shield supports as indicated but found they
were a little too far apart when trying to fit them to the yoke. There is no
real positive location for this, so be very careful.
 The
breech assembly comes next and this is produced by laminating together 7 etched
brass pieces in all, with the white metal barrel sandwiched between. The detail
on these is very fine, particularly the 'legs' of part 14 - you have been warned!
This assembly is in turn sandwiched between the arms of the yoke and then the
complete unit is fitted to the top of the pedestal. I painted the breech/barrel
before joining it to the yoke as this made life much easier, but I left the
gun sight until last, as it is very fine.
The
breech assembly comes next and this is produced by laminating together 7 etched
brass pieces in all, with the white metal barrel sandwiched between. The detail
on these is very fine, particularly the 'legs' of part 14 - you have been warned!
This assembly is in turn sandwiched between the arms of the yoke and then the
complete unit is fitted to the top of the pedestal. I painted the breech/barrel
before joining it to the yoke as this made life much easier, but I left the
gun sight until last, as it is very fine.
Although I do not yet have the 'Bridge Set' and therefore did not have precise
locations, I fitted the supports under the 'ring steps', having marked exactly
where I thought they should go. These are quite strong but look much too thin
to me, so I will probably replace them with thicker plasticard at some time
in the future.
There are no painting instructions included, as the colour scheme will depend
on the location and vessel to which the gun is finally fitted. I therefore painted
the breech, barrel and gun sight matt black with a light/medium grey for the
remainder. I found painting the breech/barrel assembly improved the appearance
enormously when compared with the bare metal as it hides some of the minute
join lines and makes the assembly look more solid. I also painted the edges
of the shoulder supports medium/dark brown to represent the leather pads.
Small Ready-Use Ammunition Locker
 The
carcass of the locker is one etched brass part, which must be folded to form
the box, and has the mounts built in, which also must be folded to represent
the deck fixings. As with all the etched brass parts, the fold lines are clearly
marked by a recessed line and hence the parts fold easily and accurately. The
base slides in easily, again using recessed lines already etched on to the two
sides. The next part of the instructions I found slightly confusing, but careful
study of the diagram cleared things up. There is an error in the instructions
as they refer to '2 x parts 4' when the part is actually number 3. I actually
cheated by cutting these parts at the corner bend line, trimming their length
just a little and then fitting them each individually. These parts not only
produce the very fine eyes on each of the locker's faces, but also increase
the thickness of the locker sides in preparation for fitting the top.
The
carcass of the locker is one etched brass part, which must be folded to form
the box, and has the mounts built in, which also must be folded to represent
the deck fixings. As with all the etched brass parts, the fold lines are clearly
marked by a recessed line and hence the parts fold easily and accurately. The
base slides in easily, again using recessed lines already etched on to the two
sides. The next part of the instructions I found slightly confusing, but careful
study of the diagram cleared things up. There is an error in the instructions
as they refer to '2 x parts 4' when the part is actually number 3. I actually
cheated by cutting these parts at the corner bend line, trimming their length
just a little and then fitting them each individually. These parts not only
produce the very fine eyes on each of the locker's faces, but also increase
the thickness of the locker sides in preparation for fitting the top.
It is important to fix the lid centrally and the correct way round, as the
finishing touches are to add the two hinges and four catches, again very fine
etched parts - so be careful! Fortunately, there are a few spare catches just
in case you lose one.
Large Ready-Use Ammunition Locker
The construction of this part is similar to the smaller box but the mounts/deck
fixings and the supports for the bottom are created differently. Again, the
etched brass has recessed lines on both sides to aid the bending process. In
this case, the bottom is dropped in from the top and has markings for eight
of the magazines, and this method I found much easier as I could stick the bottom
to the two ends and then join the side, hence ensuring the locker was absolutely
square. The magazines are created by fixing etched brass rings to one end of
each cast part and look very effective when painted, but I am concerned about
the layout in the locker. There is quite a lot of space between the magazines
and these would surely move around when at sea. Were there some wooden battens
placed between them to stop this?
In this case, the lid already has the hinges etched on it and it is only necessary
to affix the clamps with their wing nuts. If you are leaving the lid open to
show off the magazines inside, do ensure you fix these the right way up as detailed
on the instruction sheet, but note that the wing nuts will have to be twisted
through 90° to enable them to lie realistically against the locker sides.
Take care when folding the hinges to fit in the holes in the back of the locker.
This is quite simple but it took me some time to ensure that both hinges were
lined up correctly. Once in place, a couple of drops of superglue held everything
in place and then enabled the lid to be fixed in the desired position. I have
left the lid wide open for the photographs but will probably close it up slightly
when I fit it to a model.
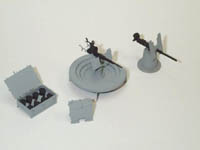
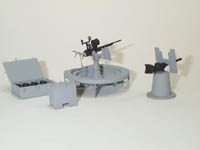
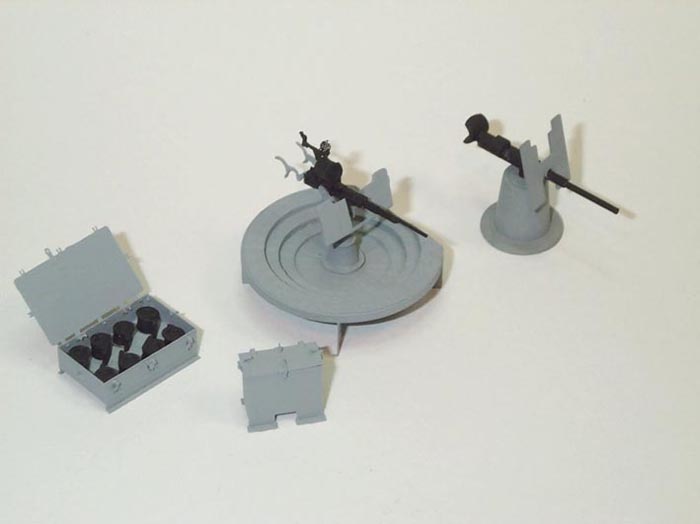
Conclusions
I found the construction of the gun very time consuming, but there is no doubt
that it is a very great improvement over the original kit item (see photos which
show the three different items from the set alongside the original gun mounting
included in the kit). I don't know if there is any reason for using white metal
rather than resin, but it seems to work well. One reason may be that the manufacturer
suggests running solder along the edge of laminated brass pieces to hide the
joins - something I did not try! Personally, I felt that etched brass was being
used in some areas where it was not particularly appropriate and the final model
therefore appeared flimsy in a number of areas. The breech/barrel assembly was
a particular case in point where I believe a good resin part, possibly with
a brass tube for the very fine end to the barrel, would have been a better option.
Similarly with the RU lockers, where our armour brethren have shown that very
good parts can be cast with etched brass just used for the handles and catches.
Obviously, this approach could not have been used on the open locker!
There is no doubt that the inclusion of the various kits from this manufacturer
will greatly enhance the Revell/Matchbox kit and I have still to study the complete
set of kits available to see if there are any areas which have not been addressed.
 Construction
starts with the 'ring steps', which require four brass overlays to be fixed
to the casting, one on each level. The brass includes two marks so that a section
of the outer ring can be cut off for some installations, such as close to the
edge of a bridge wing. After fixing the brass, the white metal steps are then
cut to match. Although the brass is marked, I found no similar marks on the
white metal part and was a little concerned as to the orientation as the base
has four holes drilled in its underside. I could find no reference to these
holes in the instructions so proceeded, hoping this would not produce problems
later. I never did find a use for these holes!
Construction
starts with the 'ring steps', which require four brass overlays to be fixed
to the casting, one on each level. The brass includes two marks so that a section
of the outer ring can be cut off for some installations, such as close to the
edge of a bridge wing. After fixing the brass, the white metal steps are then
cut to match. Although the brass is marked, I found no similar marks on the
white metal part and was a little concerned as to the orientation as the base
has four holes drilled in its underside. I could find no reference to these
holes in the instructions so proceeded, hoping this would not produce problems
later. I never did find a use for these holes!